LAUNCH X431 PRO3 V+ ELITE comes standard with SmartLink, the new VCI. This article will explain how to get started after receiving your X431 PRO3 V+ ELITE: how to activate the X431 Diagnostic Tool, how to register SmartLink, and how to download and upgrade software.
Note: This procedure also applies to other X431 PRO3 devices that come standard with SmartLink, such as the LAUNCH X431 PRO3S+ ELITE.
How to register and activate the LAUNCH X431 PRO3 V+ ELITE:
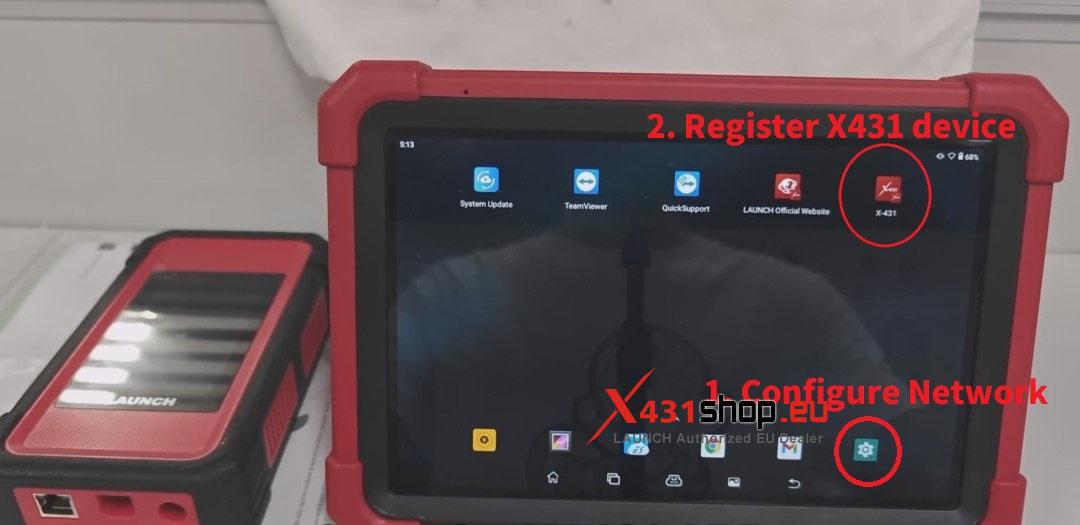
1. First, we need to set up our network connection. Click the [Settings] button with the gear icon to configure your network settings. (The LAUNCH X431 Smart Diagnostic Tool uses the Android operating system, so setting up and connecting to the network is similar to setting up a phone, so I won’t go into detail here.)

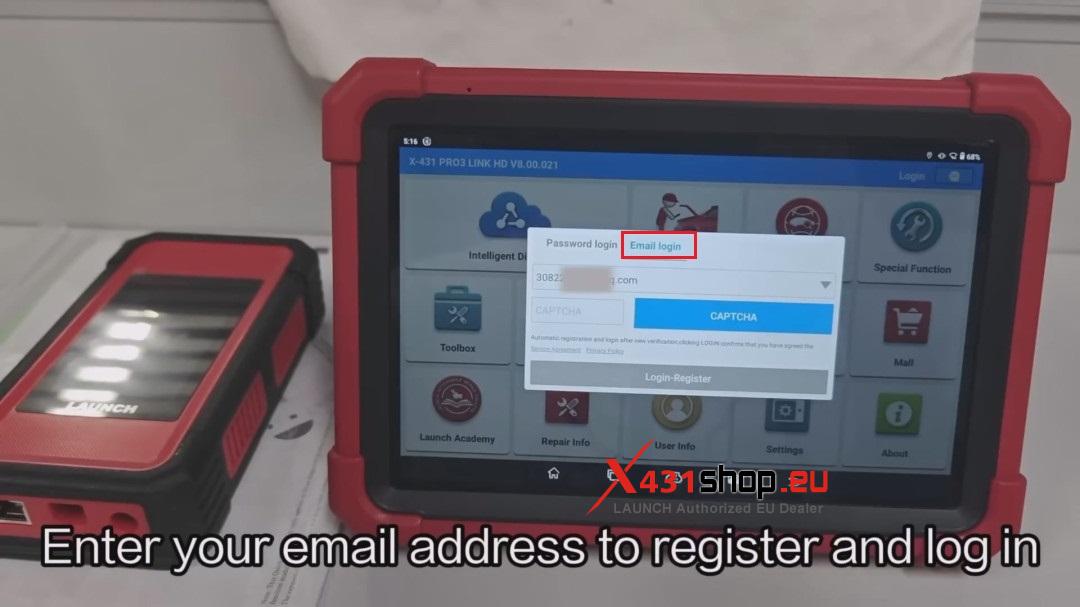
2. Click on the X-431 app. The registration option will automatically pop up when you use it for the first time. Click [Email login] and enter your email address to register.
Note: Be sure to remember your registered email address.

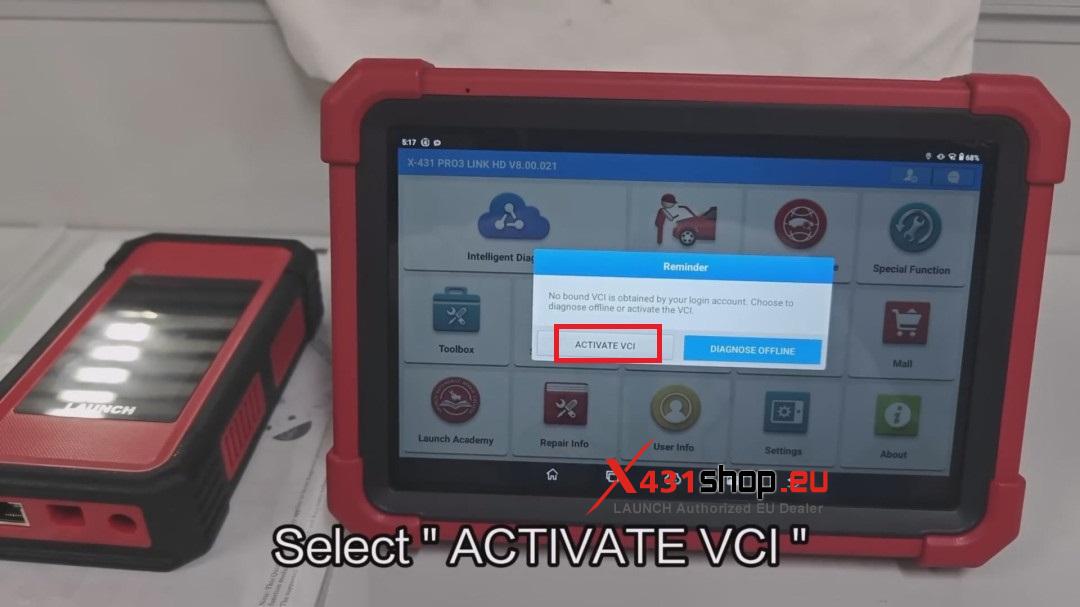
3. After registration is complete, the device will prompt you to bind and activate SmartLink VCI. Click [ACTIVATE VCI].

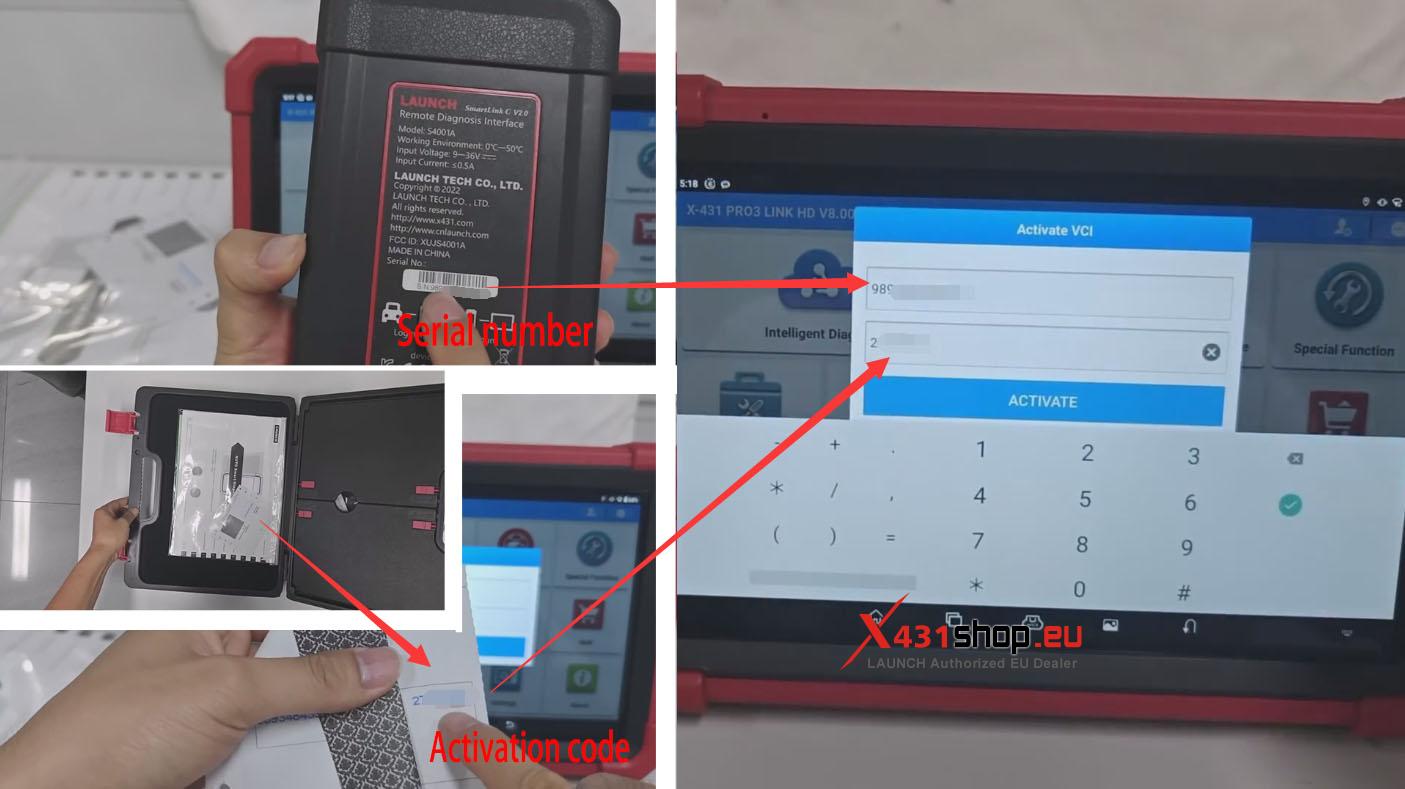
4. Enter your SmartLink serial number and activation code. The activation code is on the paper card that comes with the product when you unbox it. You can find the activation code by opening the printed inner seal of the card.
Note: If you do not find the card in the package, please contact your seller.

5. After SmartLink is successfully activated, click OK and the software download interface will automatically jump to it.


Question:
If I don’t connect to the Internet when using the X431 tool for the first time, or if I skipped these steps, how do I register SmartLink and download the software?
Answer:
The same steps apply: open the X-431 app, click [Use Info] -> [Activate VCI] to bind SmartLink VCI; click [Software Update] to download the software.


