The LAUNCH X431 IMMO tool, combined with the XPROG3 programmer, can clone vehicle gearbox. This article will use an Audi DQ380 gearbox as an example to explain how to use the LAUNCH X431 tool to clone a gearbox.
Supported devices:
X431 PRO/PRO3 series (Need LAUNCH XPROG3 Immobilizer programmer): X431 PROS V / X431 V+ / X431 PRO ELITE / Pros Elite / X431 V / PRO3 V+ Elite / PRO3S+ ELITE / X431 PRO3S+ / Pro3 ACE / Pro3 APEX / X431 PRO5
X431 PAD series (Need LAUNCH XPROG3 Immobilizer programmer): X431 PAD V(PAD V ELITE) / X431 PAD VII(PAD VII ELITE) / X431 PAD IX
Case description: Audi DQ380 gearbox ECU, the original gearbox ECU hardware failed, but still can read. Replace a used gearbox ECU and perform ECU data cloning.
Main process:
NOTE: The cloning function can only be directly connected to ECU, backup and restore through the BENCH mode.
1. Connect the original gearbox ECU through the BENCH mode to back up the original gearbox data.
2. Connect the external used gearbox ECU through the BENCH mode, and write the original gearbox data backed up before.
3. Connect the external used gearbox ECU through the BENCH mode, and back up the data of external used gearbox ECU again.
4. Compare if the original gearbox data backed up at the very beginning and the gearbox data after restored are the same (install it on the vehicle to test after checking the data are the same).
Operation guidelines:
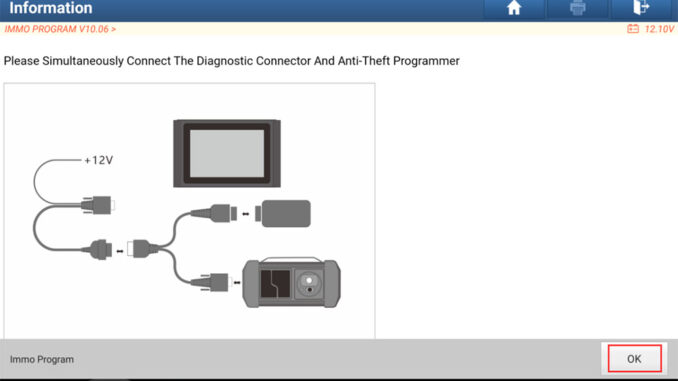
1. Select the Immobilizer programmer software, connect to the programmer, click [OK].

2. Select [Gearbox] -> [VW/Audi] -> [DQ380].

3. Please read the prompt information carefully, connect the USB cable according to the prompt, and click [OK].
NOTE: ECU may be damaged due to erratic reading and writing data of Bluetooth or WiFi in BENCH mode. Please use USB Calbe to connect the device and connector.

4. Select[View Wiring Diagram].

5. Connect the original gearbox ECU according to the picture. A 120 ohm resistance is needed for the connection between line 6 and 9, select [OK], and click [OK] after connected.

6. Please select the [Connect] function first, and test to verify whether the connection is correct. Click [OK] after connected, as shown in the figure below, the connection is OK when it prompts Connected, and you can go to the next steps.

7. Select [Backup complete data], and wait for data reading to complete.

8. Enter the file name, and then click [OK], while the data will not be saved if click [Cancel].
NOTE: In this example, we named the file [DQ380 complete date yuanche202111091355.bin]

9. You can choose the save path independently, click [OK].

10. Click [OK] and it is saved successfully.

11. Select [Disconnect], click [OK].

12. Disconnect the harness connection of original gearbox ECU, and connect the external gearbox ECU according to step 4-6.
After the external used gearbox ECU is successfully connected, click [Connect] first and it is tested normal, then select [Restore complete data].

13. Select the original gearbox data that has been backed up, and click [OK] to restore it.
Note: It will take a long time to restore the original gearbox data, please be patient.

14. Click [OK] after the data is successfully restored.

15. If you want to verify whether the data is written correctly, you can select [Backup Complete Data] again to back up the current data of external gearbox (the current external gearbox has been executed [Restore Complete Data], which means the data is the original data already), and save the data.
Select [Disconnect], press the return key to return to the first level menu, select [Data Comparison].

16. Click [F1] and [F2] respectively to import the backed-up original gearbox data and the external gearbox data which was backed up later. The purpose is to compare whether the original gearbox data is consistent with the data after cloning for the replaced gearbox.

17. Click [Comparison] to compare the two backed up data.

18. The comparison result shows that the two data are the same, then install the external gearbox on the vehicle. The gearbox cloning work was completed successfully.


