








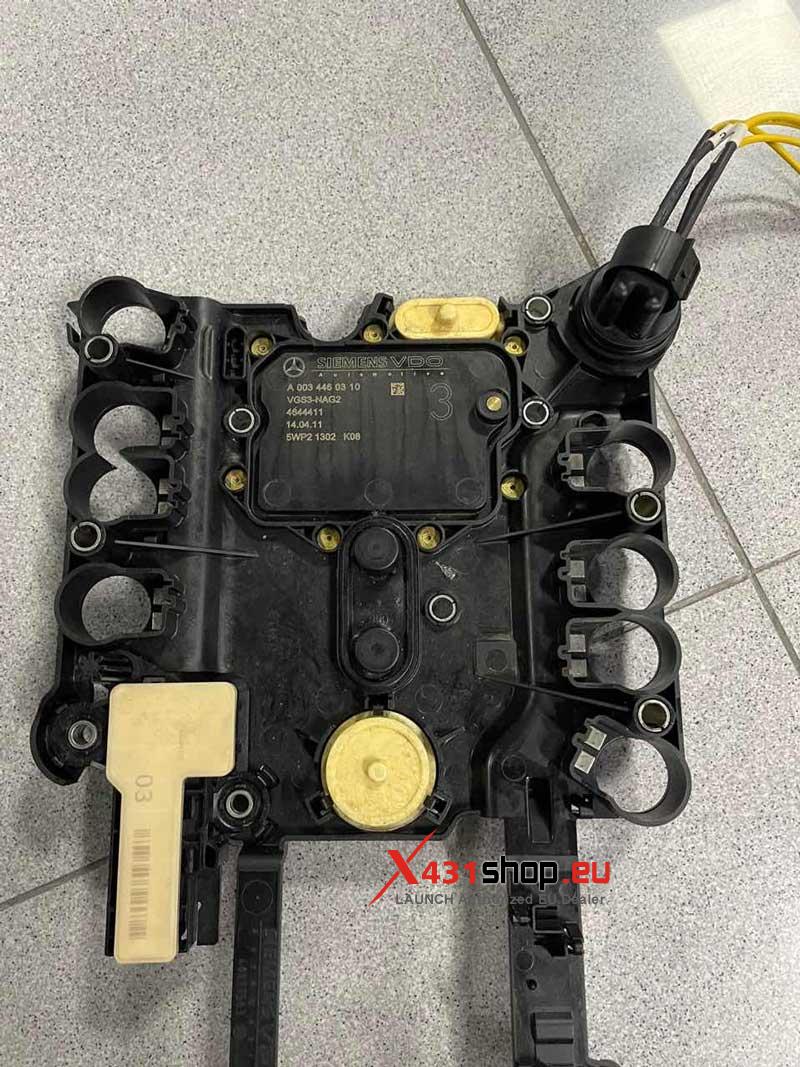
This procedure resets a Mercedes-Benz VGS3 / NAG2 (7G-Tronic EGS) transmission control unit using the LAUNCH X431 PRO5 on a bench setup. The goal is simple: clear anti-theft personalization, return the TCU to a neutral state, and prepare it for reuse or programming. The job must be done outside the vehicle with stable power and correct pinout wiring—no shortcuts.
Workshop Reality Check (Before You Start)
In real workshop conditions, this job fails for three reasons:
- Wrong pinout on VGS3 bench wiring
- Unstable power supply during erase
- Losing connection mid-process (internet or CAN drop)
If any of these happen, the module can become unresponsive. Set up properly first, then start the software.
Required Setup
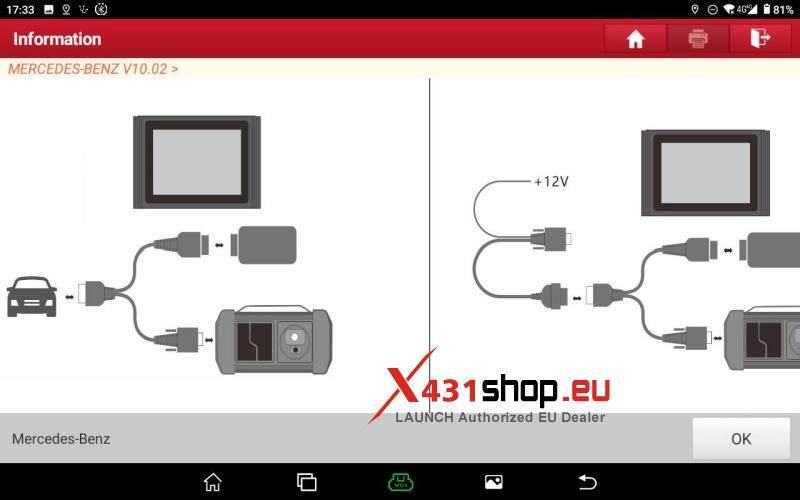
Tool: LAUNCH X431 PRO V
Module: Mercedes-Benz VGS3 / NAG2 TCU (EGS 7G)
Mode: Bench only (module removed from vehicle)
Power: Stable 12V regulated supply (do not rely on battery)
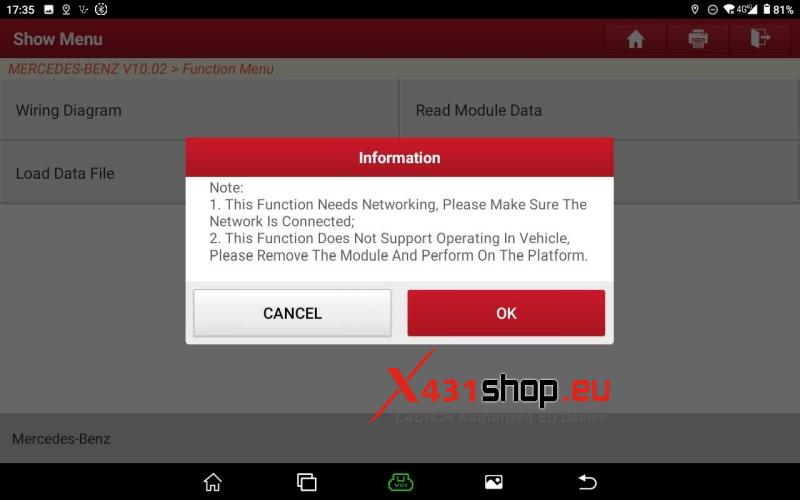
Network: Stable internet (required for anti-theft function)
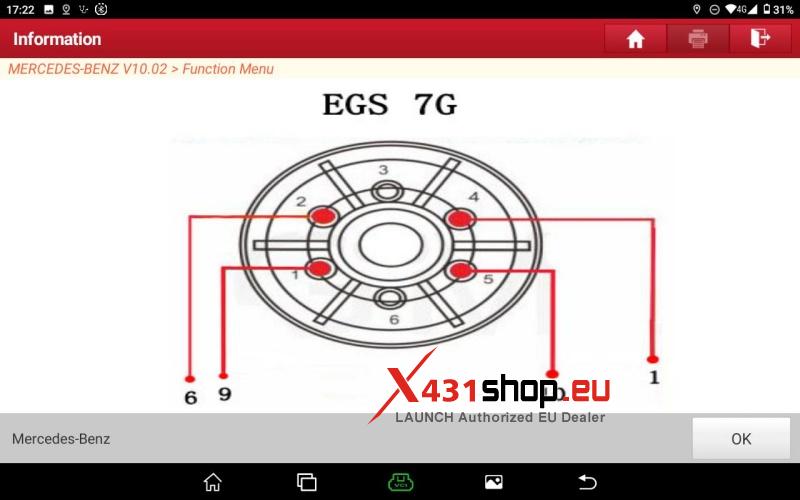
Wiring: Correct EGS 7G / VGS3 pinout diagram
Step 1 — Get Into the Right Function
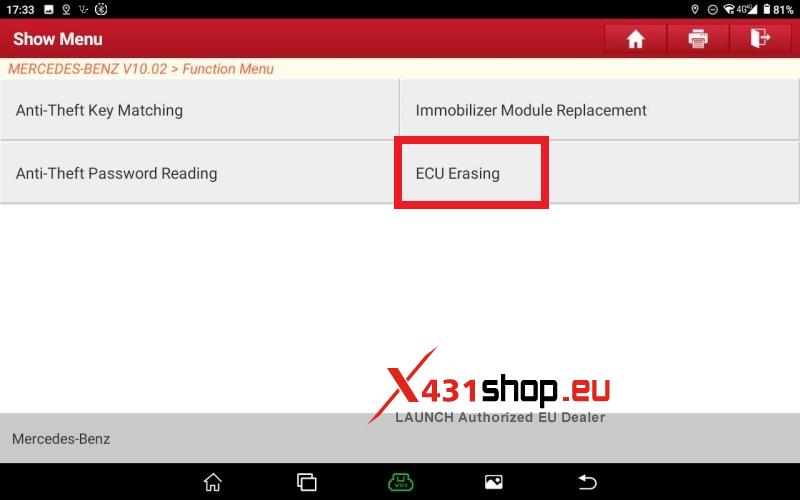
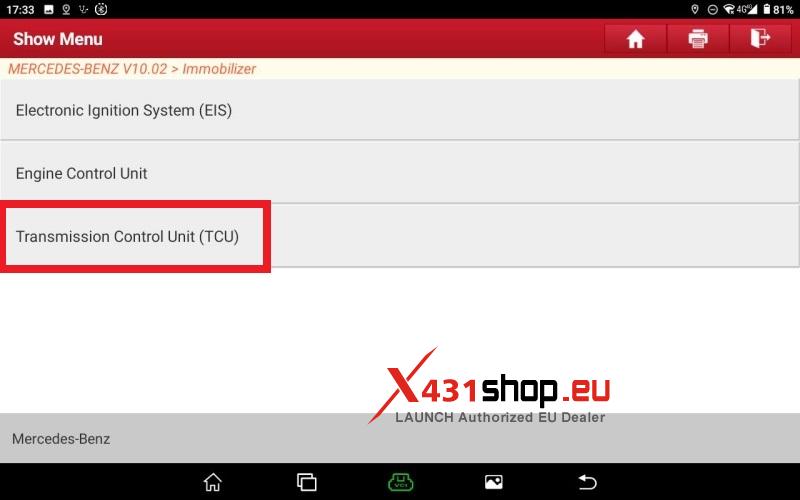
Turn on the LAUNCH X431 PRO5 and go straight into:
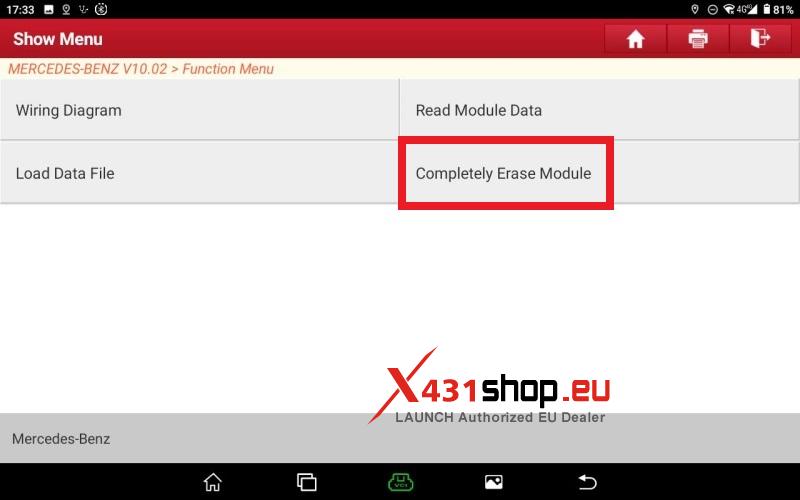
Mercedes-Benz Anti-Theft System → ECU Erasing → Transmission Control Unit (TCU / VGS3 NAG2)
No coding, no diagnosis first—just go directly to the erase function.
Step 2 — Bench Wiring (Most Important Part)
Before touching any erase button, the TCU must be stable on the bench.
- Connect power and ground first
- Then establish CAN communication lines
- Add signal/boot lines only if your pinout requires it
- Double-check against EGS 7G wiring diagram
Once wired:
- Make sure PRO5 detects the module
- If communication is unstable here, stop and fix wiring first
This step decides success or failure.
Step 3 — Erase the Module (No Interruptions)
Now start the actual job:
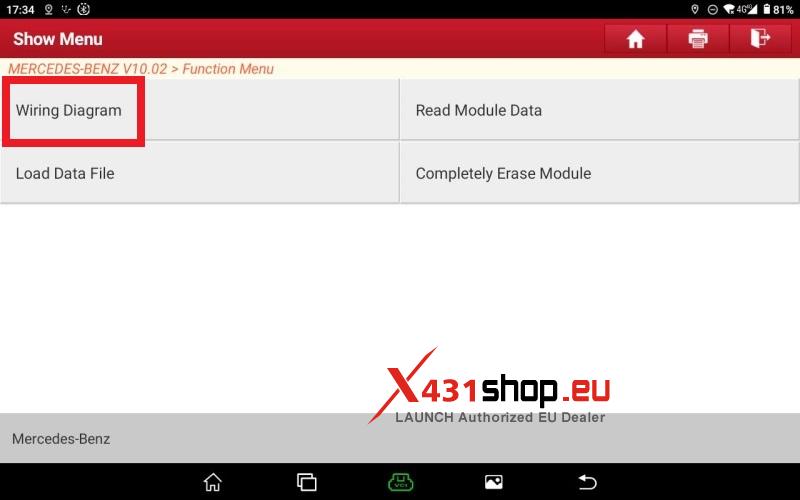
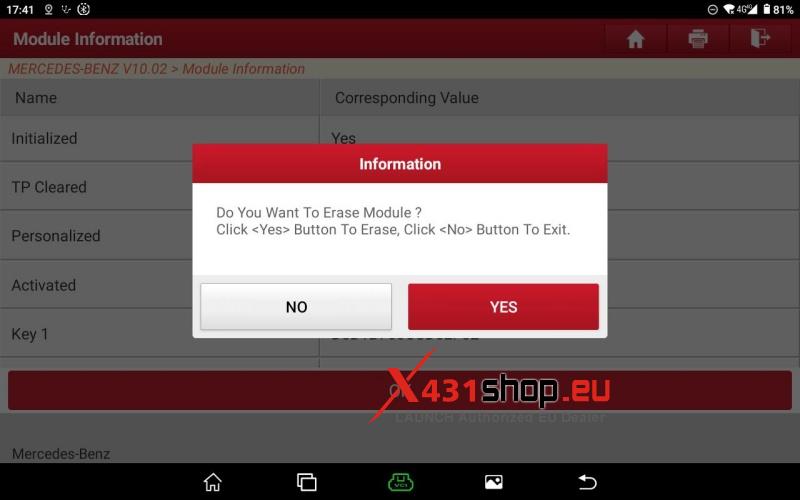
- Select Completely Erase Module
- Confirm all system warnings
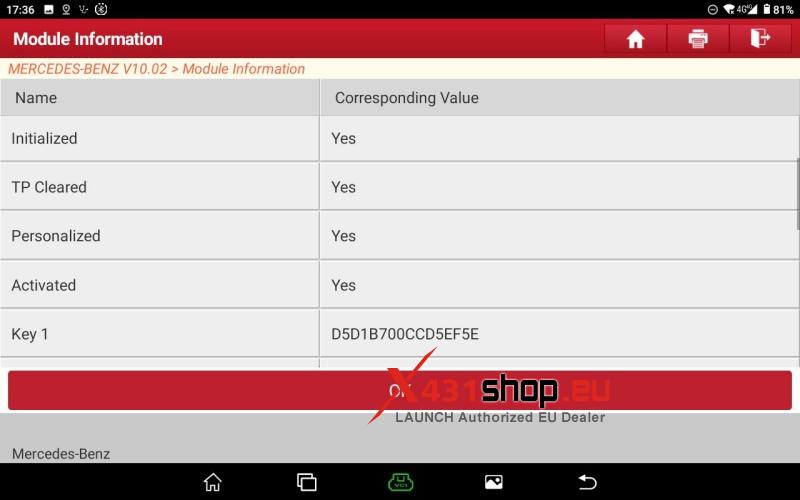
- The tool may show current status (Personalized / Activated)
At this point:
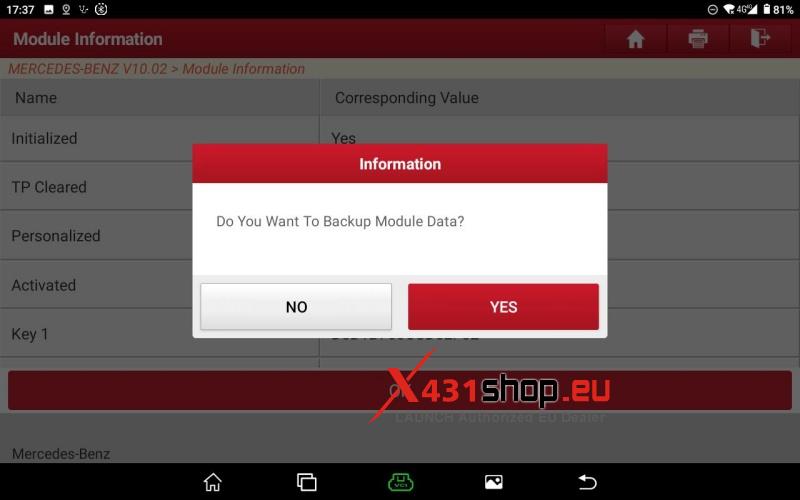
- Decide if you need a backup (usually not in workshop resets)
- Confirm erase operation
Once you press confirm:
Leave it alone. Do not touch anything.
The system will:
- Remove personalization data
- Clear anti-theft binding
- Reset internal module state
You’ll see a progress message like “Erasing Module In Progress”
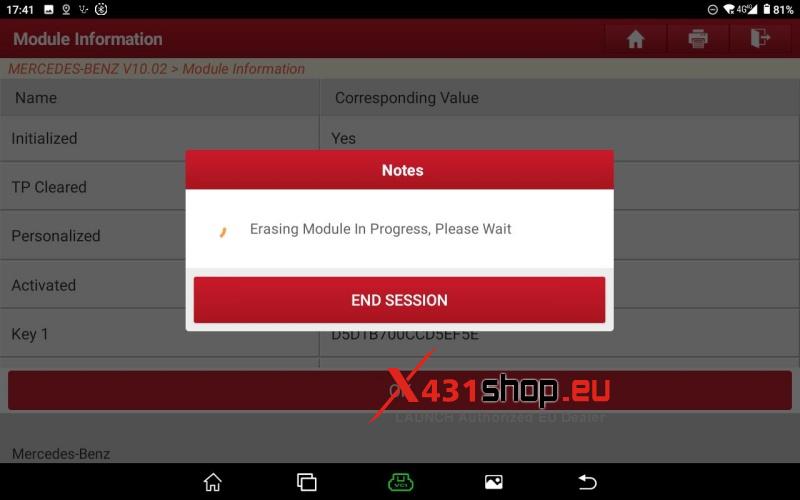
Step 4 — Wait Until Full Completion
This is where most mistakes happen.
- Do NOT disconnect power
- Do NOT close the app
- Do NOT touch wiring
Just wait until the system finishes and returns a result screen.
Step 5 — Final Check (This Is Your Proof)
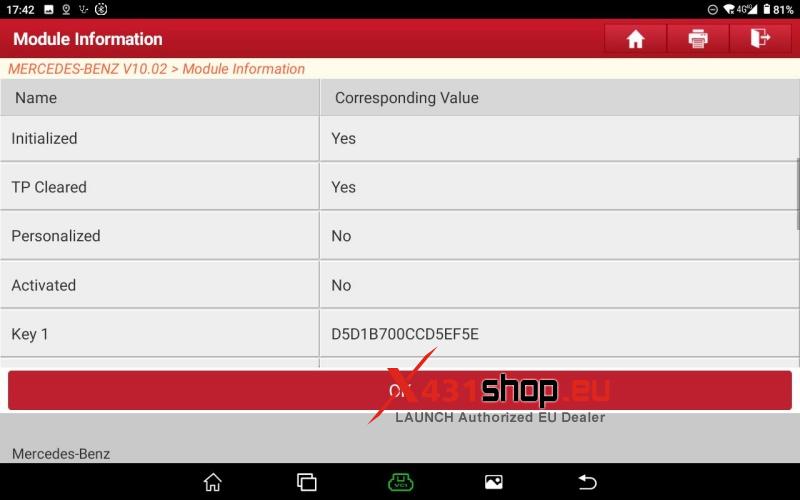
After completion, verify:
- Personalized → No
- Activated → No
- Module status → Reset / Uninitialized
If these values changed correctly, the job is done.
Tap OK and exit.
Workshop Outcome
A successful LAUNCH X431 PRO5 reset gives you:
- Clean VGS3 / NAG2 TCU (no vehicle identity)
- Ready state for coding or adaptation
- Suitable for reuse, cloning, or replacement workflow
Technician Notes (Real-World Tips)
- If PRO5 cannot enter erase function → check internet + account authorization first
- If module not detected → 90% is wiring, not software
- If erase fails halfway → power stability is the first suspect
- Never rush bench setup—this is where real technicians lose time, not in software clicks